Luxurious Homemade Chocolate: A Simple Recipe for Gifting & Indulging
40 minutes
1121 reads

About Luxurious Homemade Chocolate: A Simple Recipe for Gifting & Indulging
Dive into the rich, velvety world of homemade chocolate with this surprisingly simple recipe. Imagine the smooth, decadent melt-in-your-mouth experience – and now, imagine creating it yourself!Using just a few pantry staples like milk powder and cocoa powder, you can craft exquisite chocolates perfect for gifting or indulging in. Personalize these sweet treats for birthdays, Diwali, Christmas, or any special occasion.From the perfect sugar syrup to a glossy, professional finish, this step-by-step guide empowers you to impress with your newfound chocolate-making skills. Savor the satisfaction of creating something truly special from scratch.

Stop Thinking About What to Cook Every Day
Weight loss, PCOS, and Healthy Eating, all planned out for you. Just follow the plan and cook. From ₹399.
Recipe Time & More
Prep15 minutes
Cook25 minutes
Total40 minutes
Ingredients
Dry Ingredients
- 1 1/2 cup Milk Powder
- 3 Tbsp Cocoa Powder
Instructions
- Sift the milk powder and cocoa powder together into a dry bowl. This ensures a smooth, lump-free chocolate mixture.

- Lightly grease a flat tray or plate with ghee or cooking spray and set aside. This will prevent the chocolate from sticking.
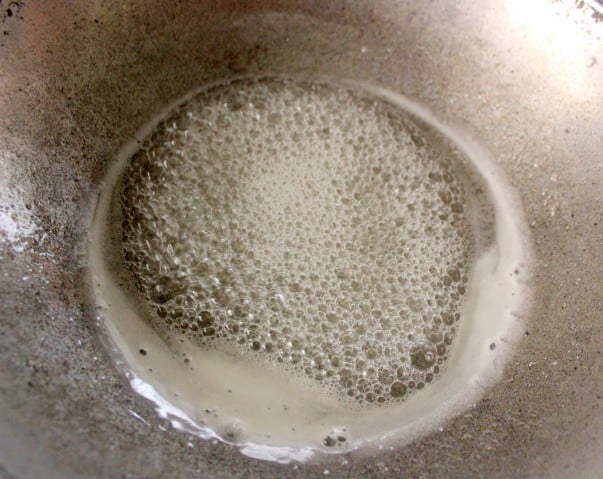
- In a heavy-bottomed pan, combine the sugar and water. Heat over high heat until bubbles appear. Then, reduce the heat to low and cook until the syrup reaches a one-thread consistency. To test this, touch the syrup between your forefinger and thumb; a thin string should form without breaking.

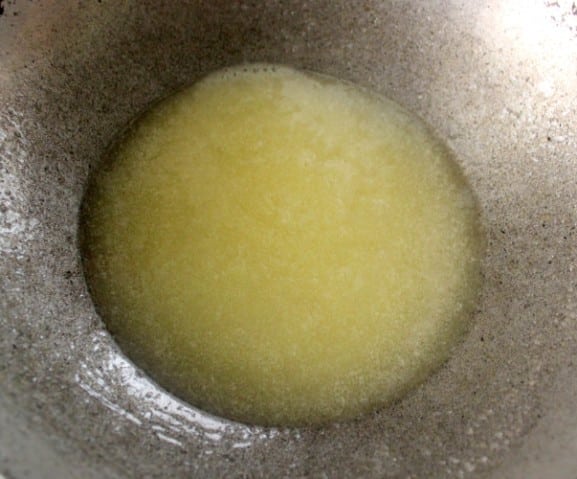
- Add the unsalted butter to the syrup and mix well until it melts completely. Maintain a low flame to prevent scorching.

- Gently add the sifted milk powder and cocoa powder mixture to the syrup. Stir continuously until the mixture forms a smooth, glossy batter. This should take about one to two minutes.

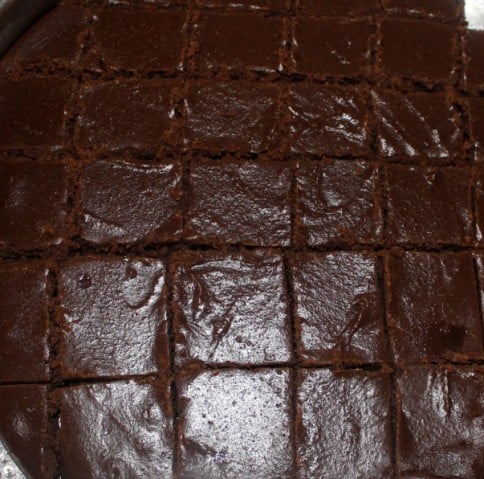
- Pour the chocolate mixture onto the prepared tray and spread evenly. Let it cool to room temperature.
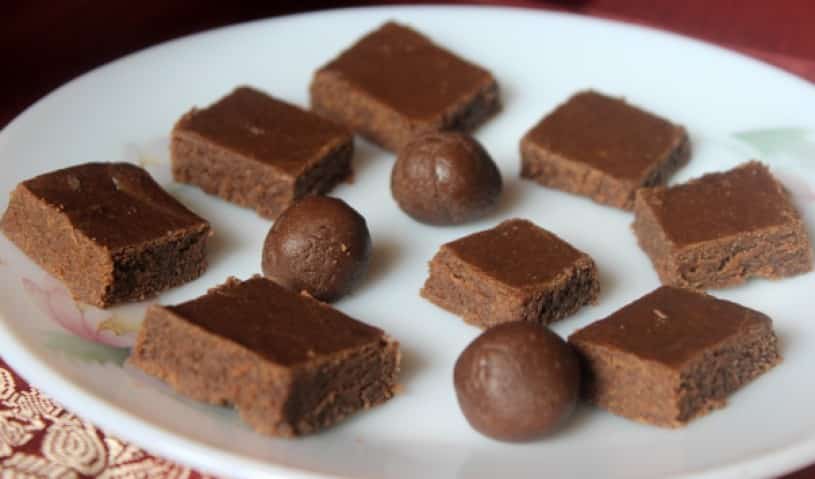
- Once cooled, cut the chocolate into desired shapes or roll it into balls. Store the chocolates in an airtight container in the refrigerator to maintain freshness.


Recipe Notes
Good To Know
- For extra depth of flavor, add a pinch of instant coffee granules or a dash of cardamom powder to the mixture before setting the chocolate.
- If you’d like to incorporate nuts or dried fruits, fold in finely chopped roasted cashews, almonds, or raisins just before pouring the mixture into molds.
- To achieve a glossy finish and prevent the chocolates from melting quickly, chill your molds in the freezer for 10 minutes before pouring in the chocolate mixture.
- Allow the chocolates to set in the fridge for at least 1 hour.
Expert Tips
- Use high-quality chocolate for the best flavor and texture. Couverture chocolate is ideal for its high cocoa butter content, which gives the chocolates a smooth, melt-in-your-mouth quality.
- Temper your chocolate properly to ensure a glossy finish and prevent blooming (a whitish discoloration). If you don't have a thermometer, the seed method works well.
- Get creative with your molds! Silicone molds offer flexibility and intricate designs, while classic polycarbonate molds provide a professional look.
Storage Instructions
- Store finished chocolates in an airtight container in the refrigerator, especially in warm climates.
- Let the chocolates sit at room temperature for a few minutes before serving to ensure the best texture and taste.
Related Posts You May Like


Recipe Nutrition
Calories: 430kcalCarbohydrates: 57gProtein: 5gFat: 22gPolyunsaturated Fat: 6.6gMonounsaturated Fat: 13.2gSodium: 10000mgSugar: 57g

Charus Cuisine
Articles: 100
5 Comments
Leave a Reply
You must be logged in to post a comment.

Great recipe! I’m eager to try it.
This is amazing! Excited to make it.
Looks incredible! Thanks for the details.
What a delightful recipe! Thanks for sharing.
Wow, this looks fantastic!